Monokle is a very helpful tool in handling and managing your K8s configurations.
Monokle Desktop helps you to:
⚡ Quickly get a high-level view of your manifests, their contained resources and relationships
📇 Leverage Git to manage the lifecycle of your configuration
✅ Validate resources using OPA policy rules
🖊️ Easily edit resources without having to learn or look up yaml syntax and see the changes applied
🔨 Refactor resources with maintained integrity of names and references
📷 Preview and debug resources generated with kustomize or helm
➕ Visualize extended resources defined in CRD
🤝 Compare resource versions against your cluster and apply changes immediately or through pull requests
📚 Create multi-step forms using Monokle's templating system to quickly generate manifests
💡 And much more!
So, let's get straight to the stuff. Creating your own template plugins in Monokle.
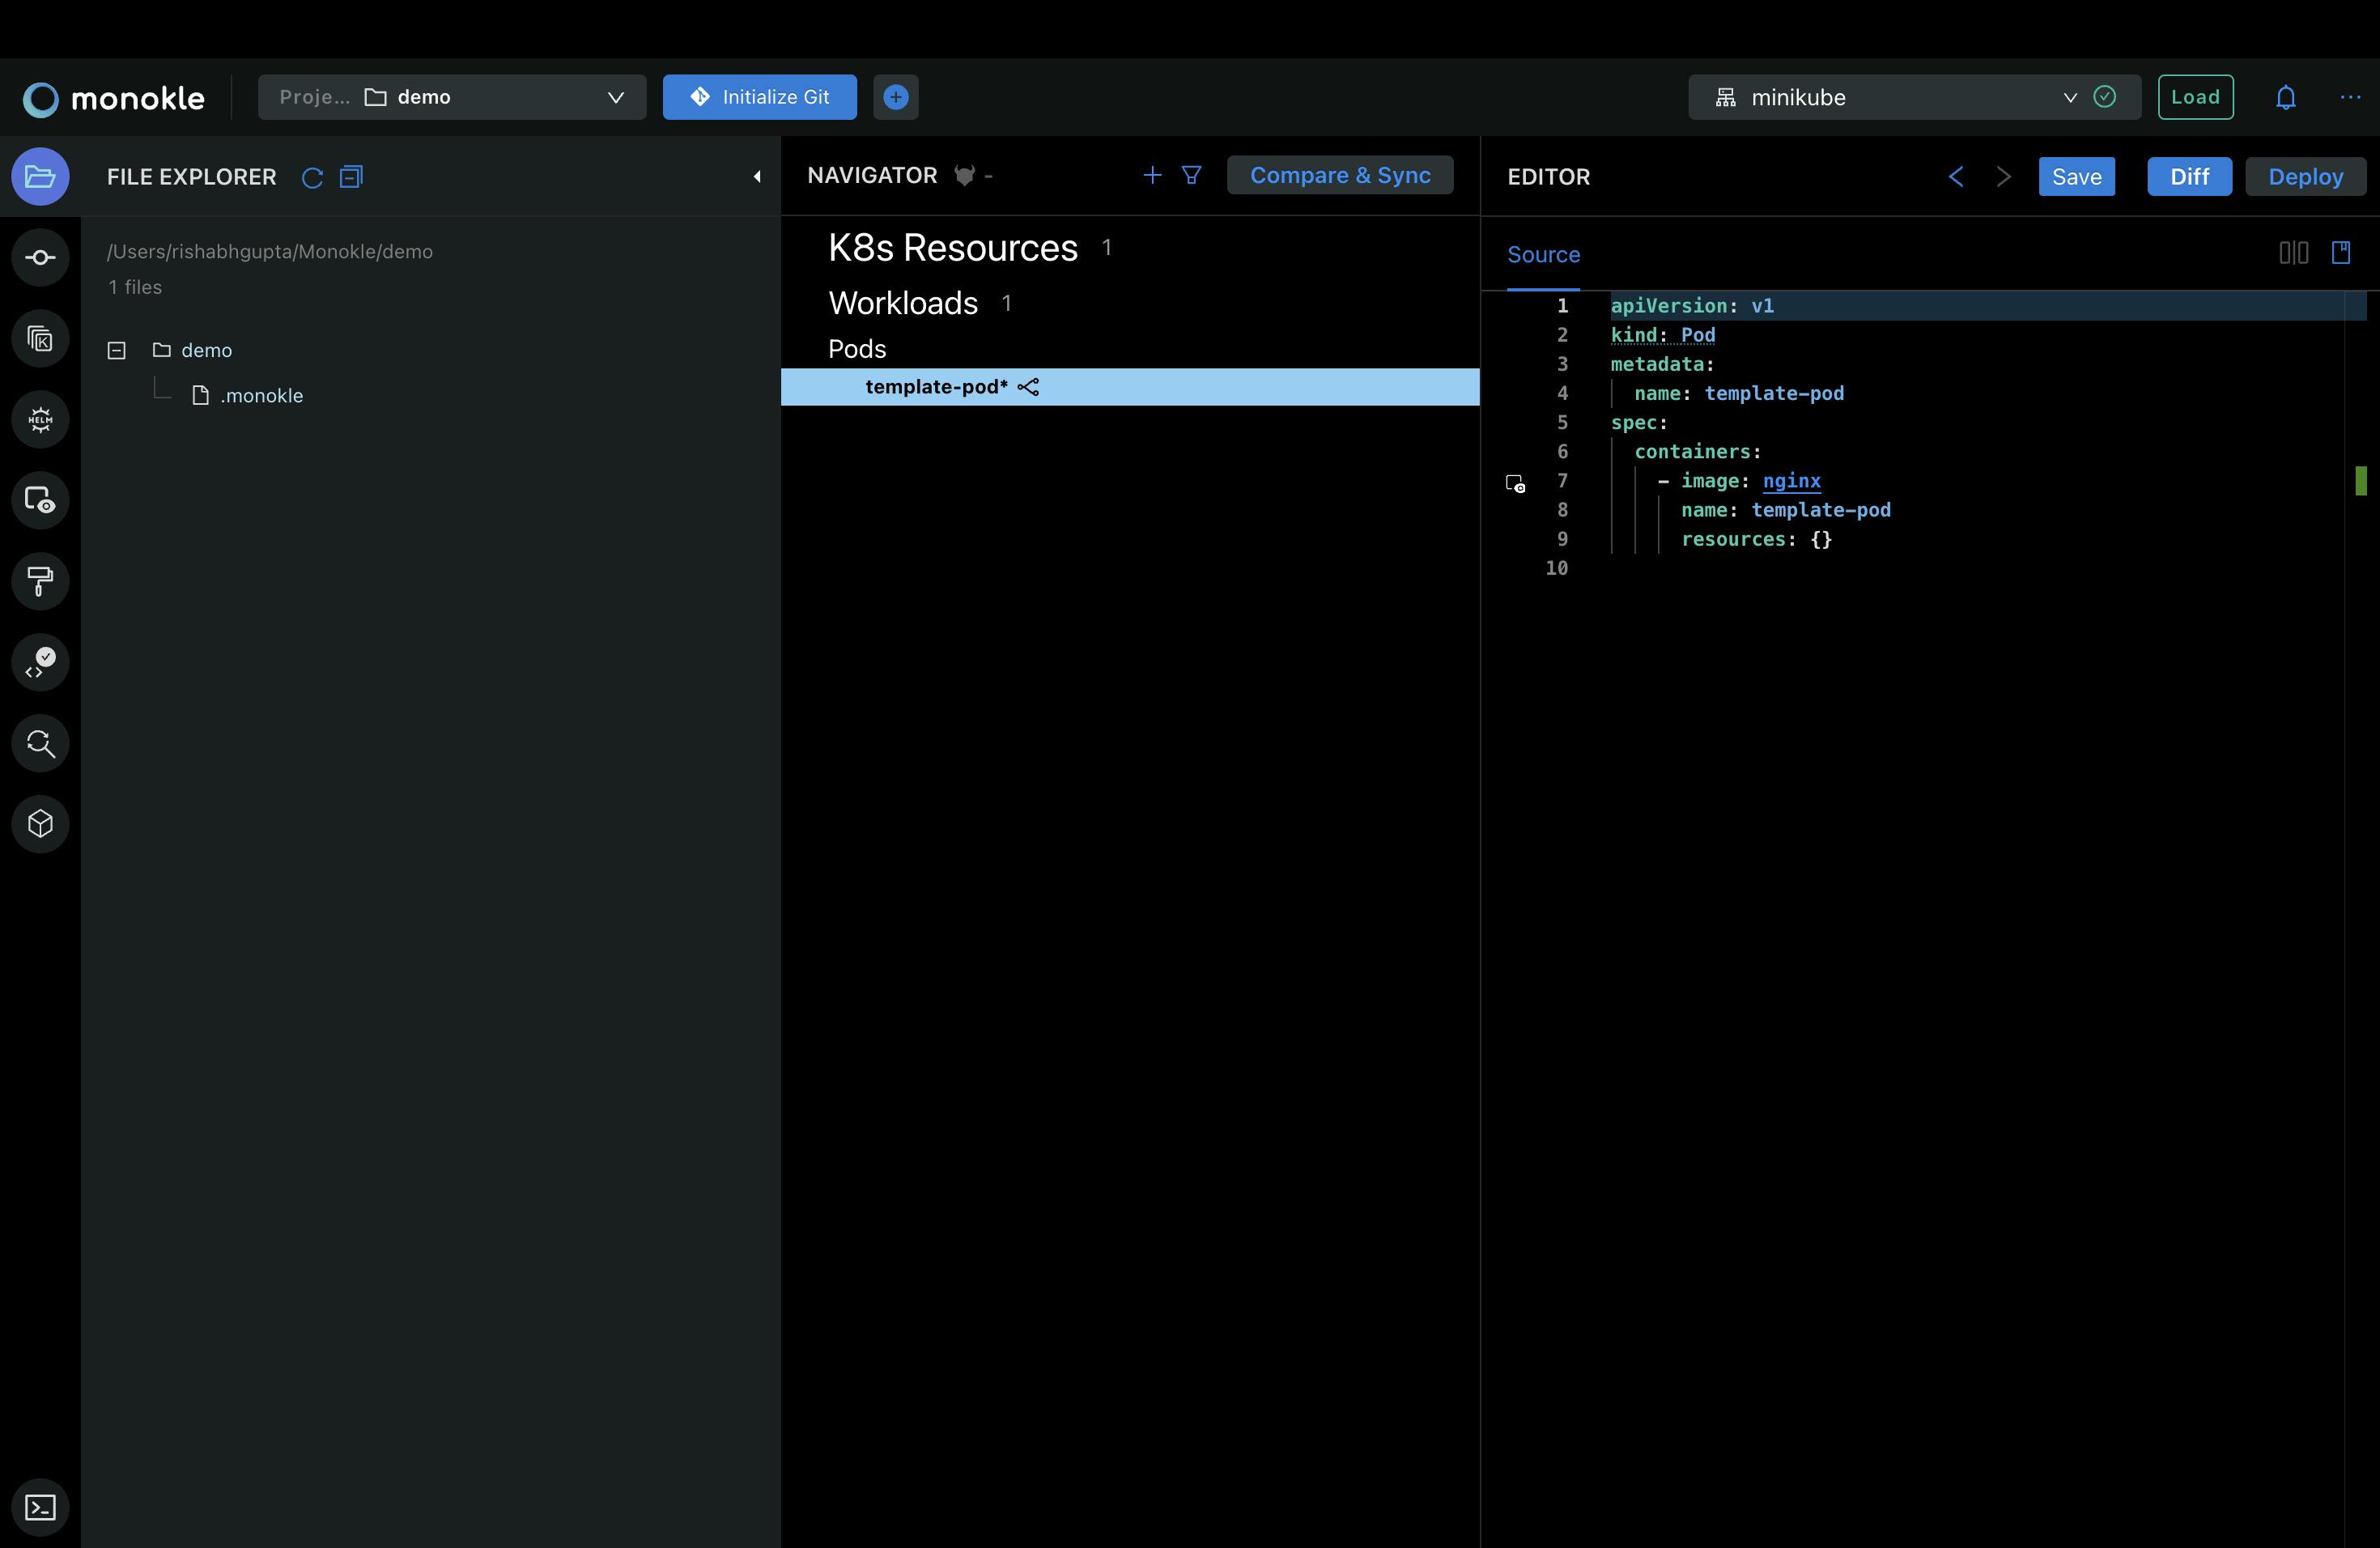
Below is a screenshot in which a basic pod template is created with nginx image.

Steps
First step is to create an empty Github Repository with a name for example "monokle-templates-plugin".
Clone the repo on your local machine and open the project in VS Code.
Create a new json file named "package.json" in your project folder and insert in it the following:-
 {
     "name": "Templates Plugin", //name of your plugin
     "description": "Custom templates plugins", //description of your plugin
     "version":"1.0.0", //version name usually 1.0.0
     "author": "Rishabh Gupta", //your name
     "repository": "https://github.com/RGTechPro/monokle-templates-plugin", //repository path which you created in the first step
     "monoklePlugin":{
         "id": "com.github.monokle.RGTechPro.plugin.templates", //id  in the correct format : <com.github.monokle.<github_username>.plugin.templates>
         "helpUrl": "https://github.com/RGTechPro/monokle-templates-plugin", //repository path which you created in the first step
  "modules":[
     {
         "type":"template", //type
         "path":"basic-pod-template" //folder name
     }
 ] //array of all the modules you wish to define
     }
 }
Create a new folder that will contain the schemas and monokle template. Here we have named it as "basic-pod-template".
Now create a file named "monokle-template.json" inside "basic-pod-template" folder with the following format:
 {
     "name": "Basic Kubernetes Pod",// name of your pod template
     "id": "com.github.monokle.RGTechPro.plugin.templates.basic-pod-template", //id  in the correct format : <com.github.monokle.<github_username>.plugin.templates.<name of your pod-template>>
     "author": "Rishabh Gupta", //your name
     "version": "1.0.0", //version name usually 1.0.0
     "description": "Creates a Pod for a specified Image", //description for it
     "repository": "",
     "type": "vanilla", //type of the template i.e. Vanilla in our case
     "forms": [
       {
         "name": "Pod Settings",// form name
         "description": "Specify the Image to use",//form description
         "schema": "form-schema.json", //This defines which data that will be sent to the template manifests.
         "uiSchema": "form-ui-schema.json" //The role of this form is to specify information about how to render the form
       }
     ], // forms array which we will reference it in another json file
     "manifests": [
       {
         "filePath": "template.yaml"// Using the manifests property from the monokle-template file, specify the above template manifest like this
       }
     ],//manifest array
     "resultMessage": "Pod resource created successfully!",//message  which will be displayed after creation of pod
     "helpUrl": "https://github.com/RGTechPro/monokle-templates-plugin" //repository link
   }
Create a file named "form-schema.json" inside the same folder which will be responsible for sending data to template manifests. Add the following stuff to the file:
 {
     "type": "object", //type
     "required": ["name", "image"], //fields which are required
     "properties": {
       "name": {                //first field
         "type": "string",
         "default": "my-pod"
       },
       "namespace": {        //second field which is optional
         "type": "string"
       },
       "image": {           //third field
         "type": "string"
       }
     }
   }
Create another file named "form-ui-schema.json" inside the same folder which will be used to specify information about how to render the form. It will contain the following info:
 {
     "name": {                   //Name
       "ui:title": "Name",
       "ui:help": "The name of the Pod"
     },
     "namespace": {              //namespace -option field
       "ui:title": "Namespace",
       "ui:help": "The target namespace for the Pod",
       "ui:widget": "namespaceSelection"
     },
     "image": {               //image
       "ui:title": "Image",
       "ui:help": "The image name to use for the Pod, for example nginx-ingress:latest"
     }
   }
Last file which we need to create is "template.yaml" which will contain your pod template. Just copy everything as the default pod file created by monokle other than the inputs we are taking through the forms:
 apiVersion: v1
 kind: Pod
 metadata:
   name: [[forms[0].name]] #name of first index of the forms array
 [[forms[0].namespace ? " namespace: " + forms[0].namespace + "\n" : ""]] # if namespace entered then namespace otherwise ""
 spec:
   containers:
     - image: [[forms[0].image]] #image of first index of the forms array
       name: [[forms[0].name]] #name of first index of the forms array
       resources: {}
Now we have created our customizations. We will commit and push the changes to our GitHub Repo.
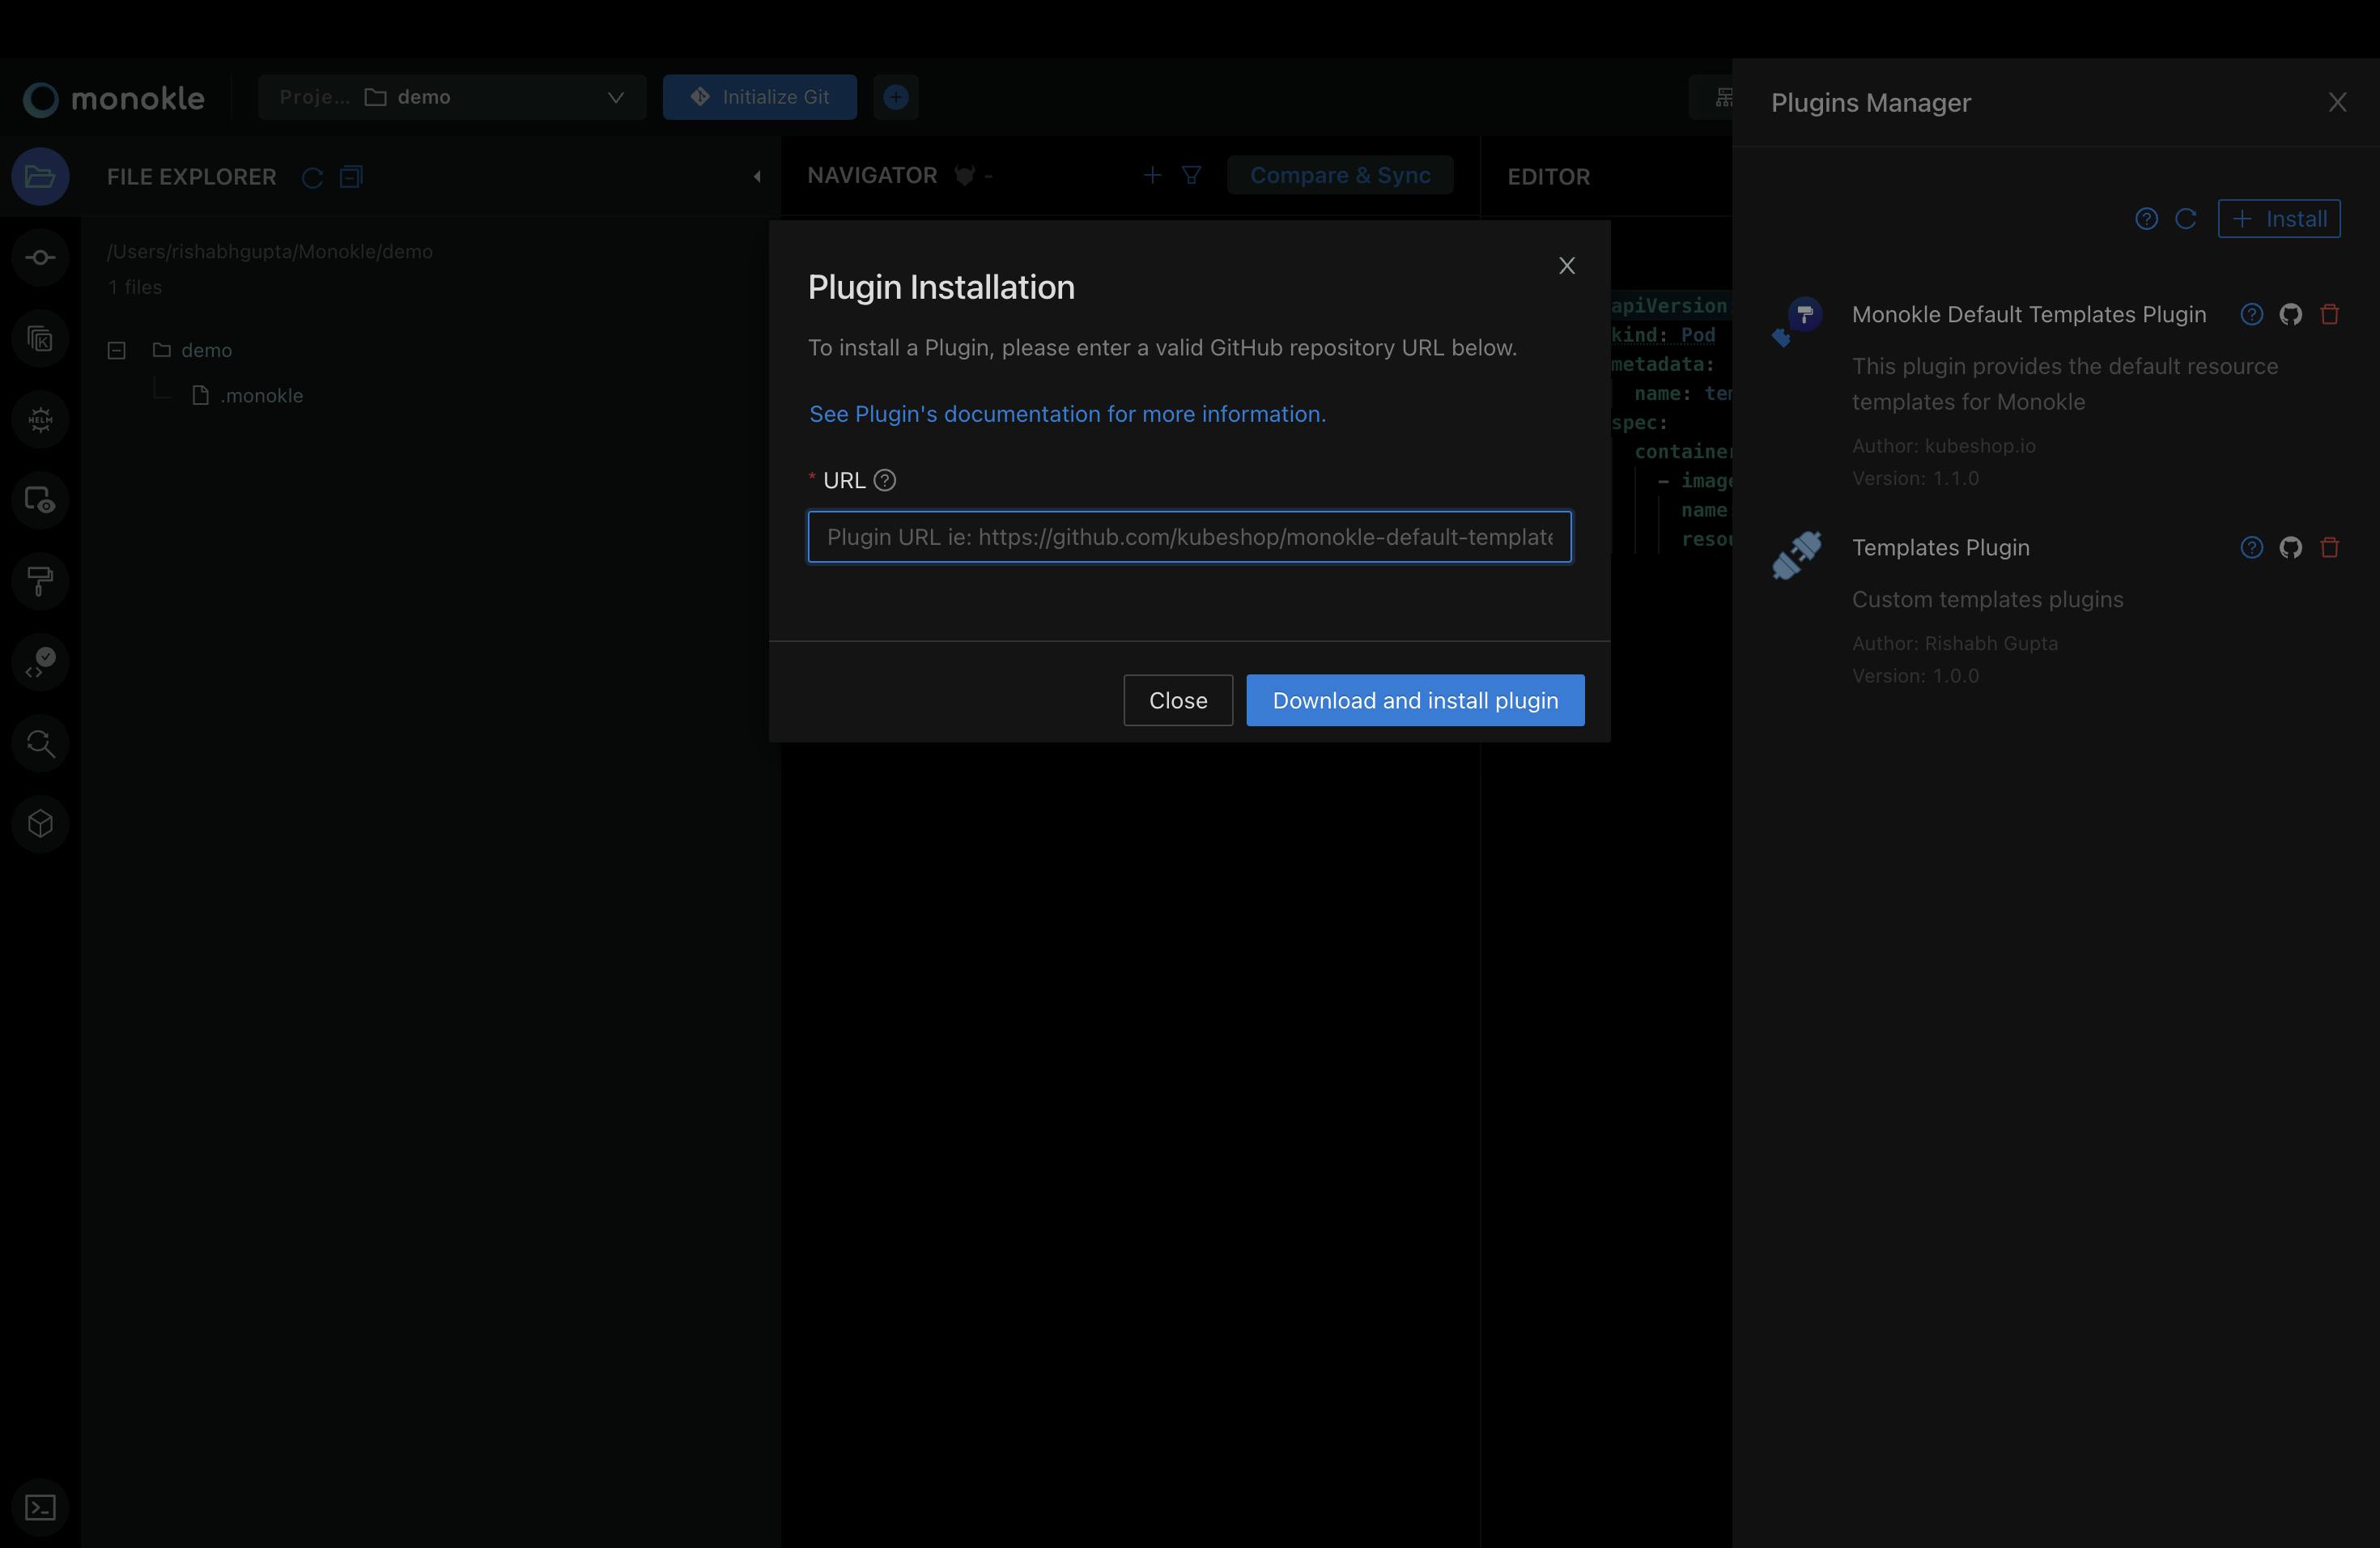
In Monokle, Go to Plugins Manager> Install > Enter the GitHub repo link and press Download and Install plugin. You are good to go. Your custom template plugin is successfully installed.

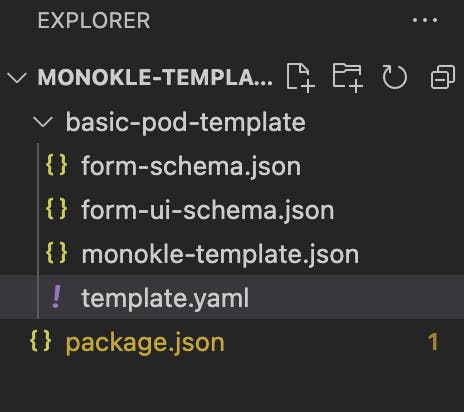
Folder structure:

Thank you!
My plugin GitHub link.
